How to Live Stream
Creating a Live Stream on our Video Hosting Platform
Are you wondering how to live stream? This guide provides a quick walk-through, detailing what is required to get started on how to stream live video over the StreamingFilz service. It includes a checklist of things needed, basic requirements and also some baseline suggestions of equipment or setups to start broadcasting for those who are completely new to the technology.
Two ways to start live streaming:
- Live stream from a PC or Mac based software encoder.
- Live stream from a hardware based encoder.
Internet connection required:
A reliable internet connection is mandatory to stream to our network. This needs to be a broadband connection, preferably wired as wireless is prone to have dips in performance.
The overall speed of your connection should be at least double what you plan to stream at. So a 500kbps stream would need a 1,000kbps connection. If you are streaming at half your connection speed, do not try to watch your own feed at the same time, as that will exceed your internet’s capabilities.
If you are doing more than one bitrate, add up the total to see if your connection can support it.
A StreamingFilz checklist:
- A StreamingFilz account.
- A StreamingFilzLive channel that you create.
- A Media Encoder, i.e. Adobe Live Encoder profile or a publishing point, found under STREAM after signing in.
Video Source:
All video has to be brought through a computer or hardware encoder to stream. If it’s through a computer, it needs to be through a video capture card such as the Osprey line by Viewcast, with the Osprey-100 pictured. Your computer may or may not already be set up to accept video feeds. The simplest way to check, and stream over DaCast, is through an attached webcam found in most modern laptops.
This means the computer is likely ready to stream, although quality will not match that of a dedicated camera. If it is a camera and you want to live stream, it should have a UVC, iLink, USB3 or Firewire connection that you will need to find a way to feed this into the computer and/or encoder.
If you need a camera, here are three that have been used over our system and the general price range for them. Nearly any digital camera can be used, though, if it can be hooked up and the feed fed to an encoder.
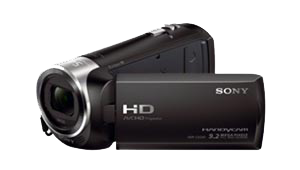
$180 – $200
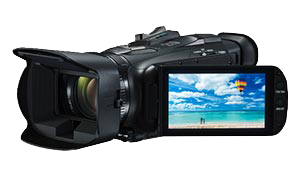
$500 – $1000
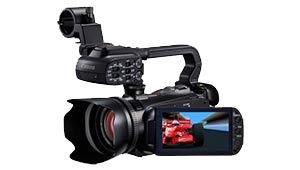
$1499 – $1699
Computer requirements for a PC encoder:
- Minimum of 2 GB of RAM, the more the better.
- Minimum of 500 MB of free hard drive storage space, depending on size of the stream.
Computer requirements for a Mac encoder:
- Minimum of 1 GB of RAM. The more the better.
- Minimum of 500 MB of free hard drive storage space, depending on size of the stream.
- Mac OSX version 10.5 or later.
- QuickTime 7 or later and QuickTime compatible video capture device.
- 2 GHz Intel Core 2 Duo or a faster processor.
Software encoder:
There are many software solutions for RTMP encoding. The only free solution, though, is to use Flash Media Live Encoder. A link to download the program is provided under ENCODER SETUP after clicking Flash Media Live Encoder as your encoder of choice.
This will give you an option to download the program. After installing, click:
At the top left click FILE and then OPEN PROFILE. Now find the profile you saved earlier and open it. If a few error messages appear, such as a “Profile Validation” message, click OK. When you are ready to stream, click the green START button in the program, found at the very bottom. The program will now ask for the login and password that are also under ENCODER SETUP. Enter these to begin streaming.
There are many alternatives to Flash Media Live Encoder as well. These perform better but are not free. Examples include: Telestream’s Wirecast and VidBlaster.
Hardware encoder:
If using a hardware encoder, such as a NewTek TriCaster or a TouchStream from Digital Rapids, select “professional encoder” as your acquisition method in your StreamingFilz account. Now go to STREAM to get a publishing point. This will give you a complete URL or a Stream URL and Stream Name, using one or the other depending on your encoder. If it asks for a password and username, leave this blank. If you are using a TriCaster, click here for separate documentation.
Making the most of your StreamingFilz account:
Once you are set up and starting to live stream, now you can make the most of your account. The basics include embedding the live stream on your website. This can be done at all plan levels and at no additional cost. You can also add optional Pay-Per-View to earn money.